

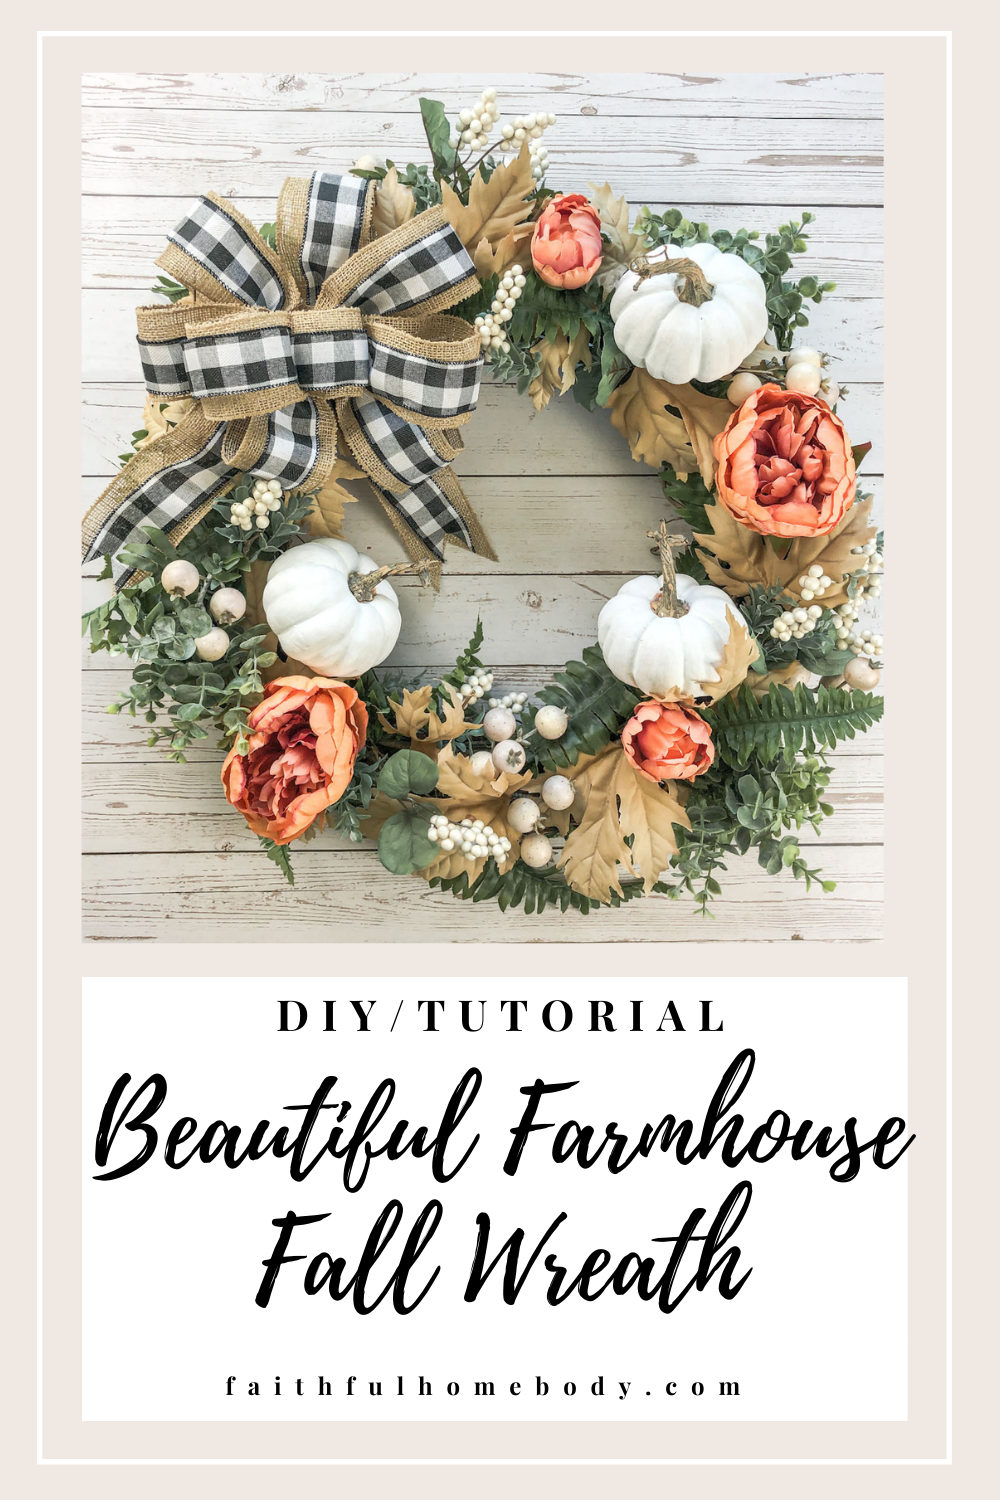
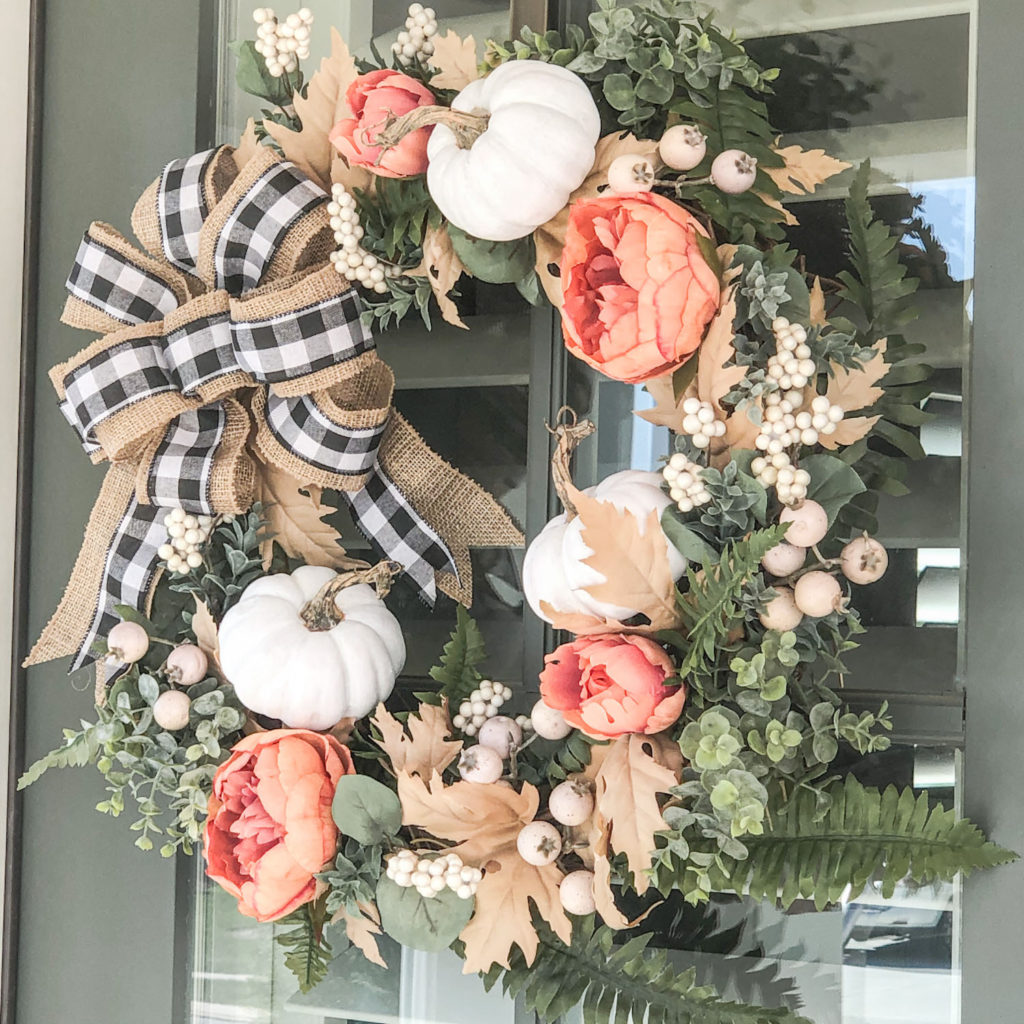
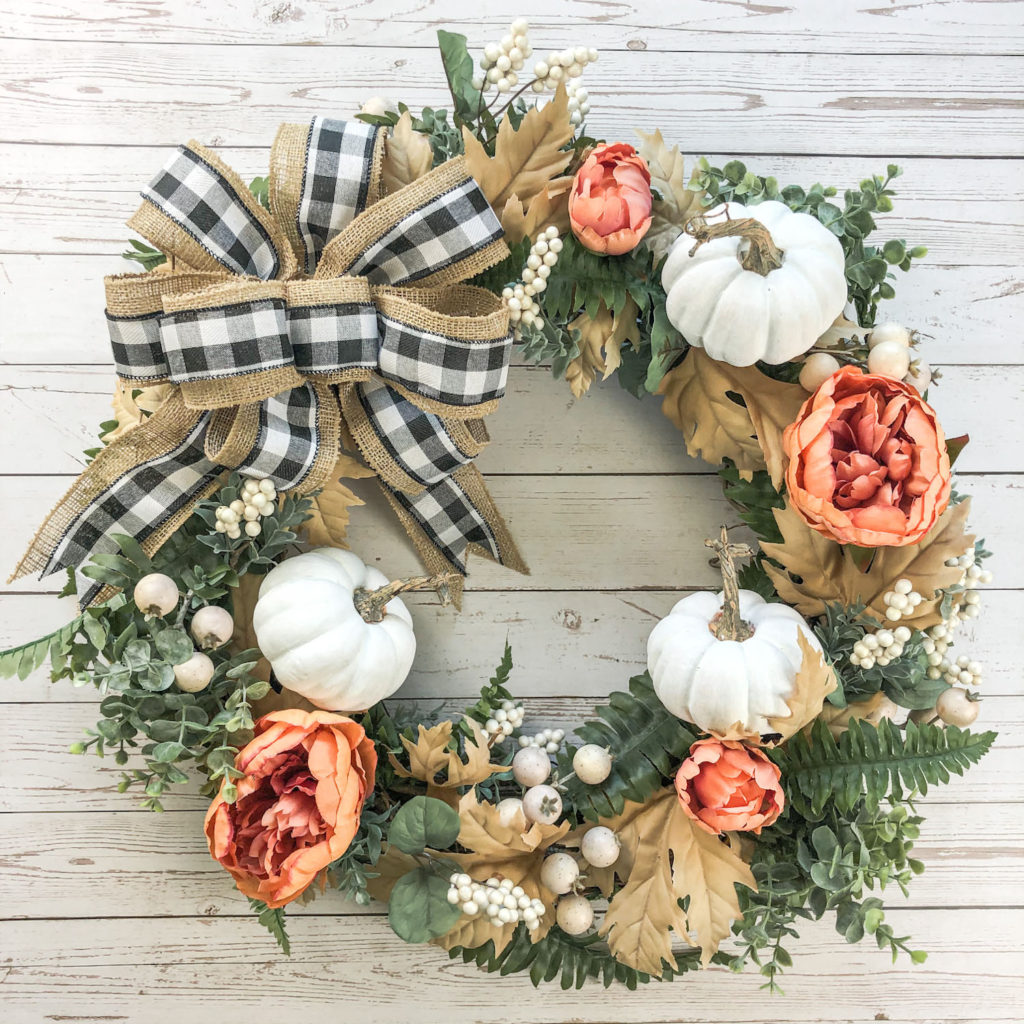
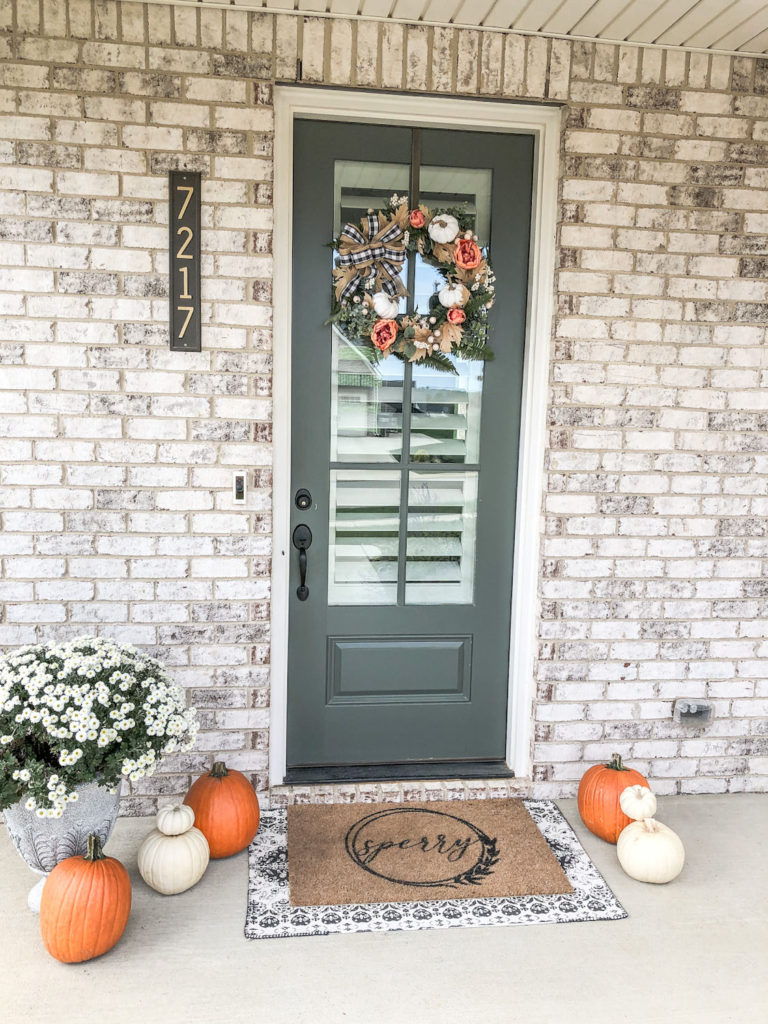
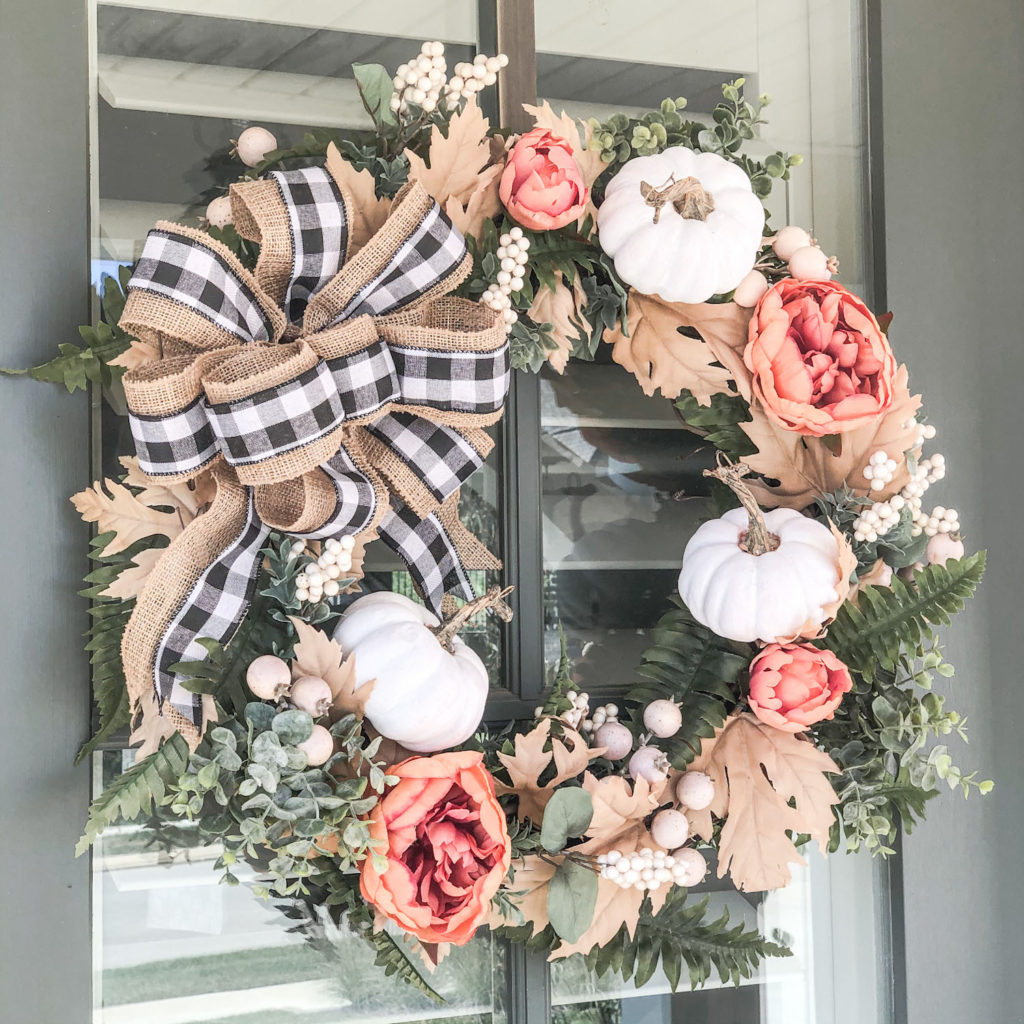
This Beautiful DIY Farmhouse Fall Wreath is decorated with mini white pumpkins, peonies, berries, and a burlap and buffalo plaid ribbon. I love how it turned out! Keep reading to see how you may also create a lovely wreath for fall.
It’s fall y’all! Once the weather starts changing, the air has a chill to it, the days get shorter, and the leaves start to turn, I have to admit – I’m a little reluctant to embrace fall. I know that may not be a popular opinion, so don’t come for me!

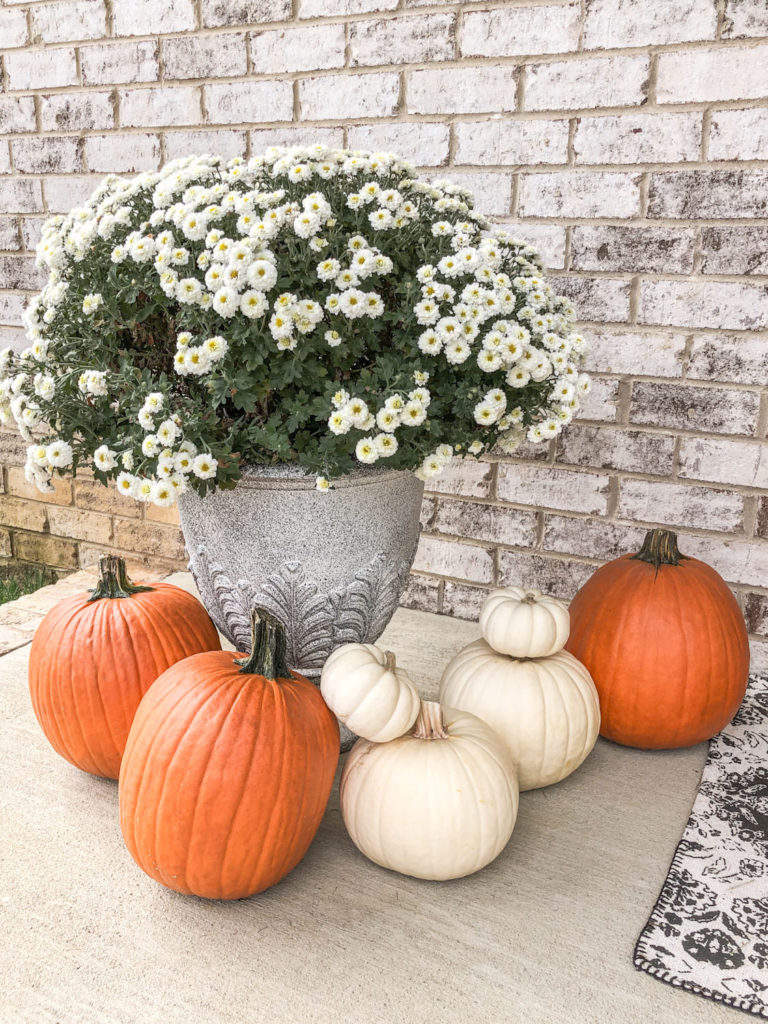
Yet, around mid-September, something happens. Pumpkins are showing up at all the stores, I pull my decorations out of storage, I’m buying everything pumpkin flavored, I find myself craving a Pumpkin Cream Cold Brew from Starbucks (I mean, have you tried them?! They’re amazing!), I’m admiring the beautiful colors of trees all around me…and the next thing I know, I’m kinda diggin’ the whole fall vibe.
This year, I was inspired to start the season by making a fall wreath for my front door.
It was just the look I was going for this fall and I couldn’t be more pleased with how it turned out. I’m hoping this tutorial for a Beautiful DIY Farmhouse Fall Wreath help inspire you to create a lovely fall wreath as well!
Display indoors, on the front door, or outside in a covered area.
Gather the Materials
First, I had to gather supplies. I visited two craft stores, Hobby Lobby and Michaels, in mid to late September. (I know, I know, I felt I was getting a little late start, too!)
However, feel free to use what you already have! Play around with different faux greenery and florals you have at home. I’m using mini pumpkin picks and faux stems. These can easily be switched out from year to year to change up the look of your fall wreath.
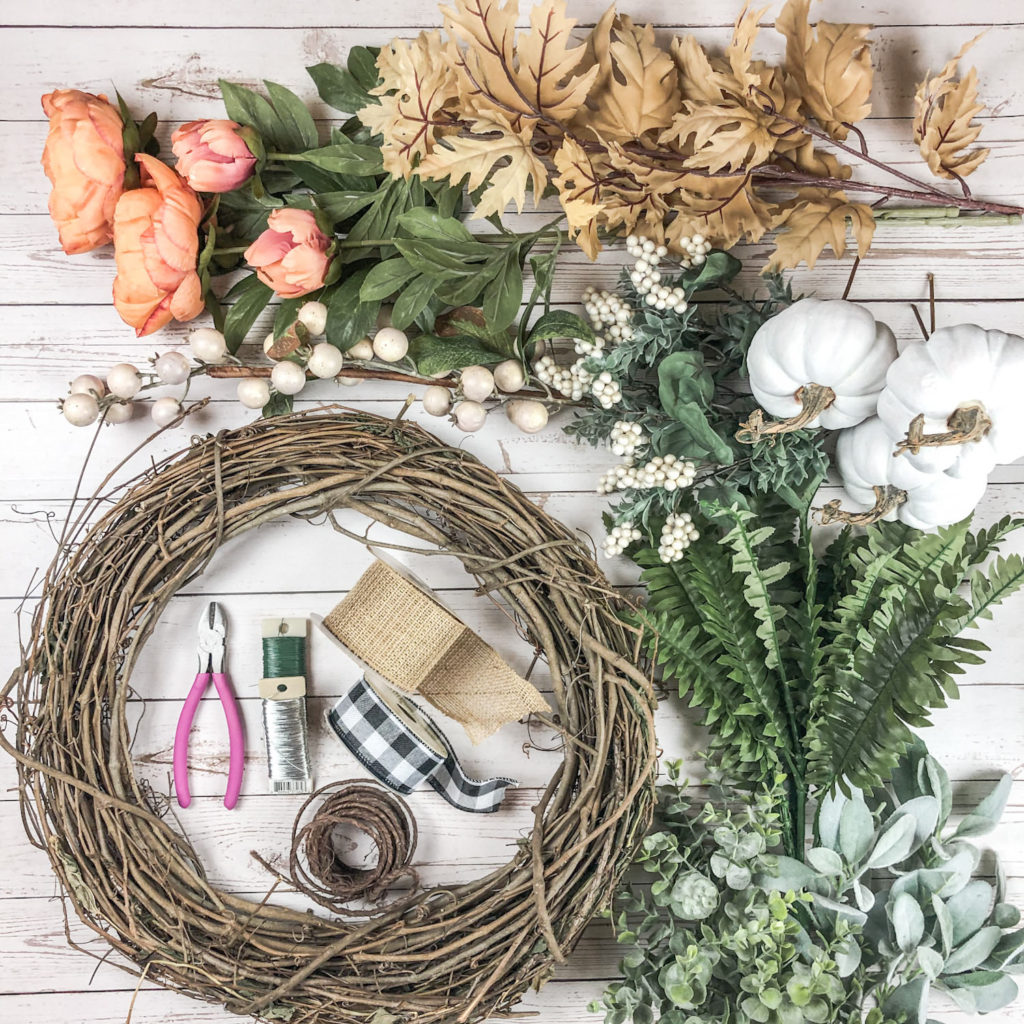
Supplies
Wreath:
- 18″ diameter grapevine wreath
- One bunch of faux leaves. Maple, tan, or fall colors. (white would be pretty too!)
- 3 faux eucalyptus stems/picks
- 1 large faux fern stem
- 1-2 orange peony stems (4 flowers)
- 3 white berry/floral accent stems/picks
- 1 large white/cream berry pick
- 3 faux white mini pumpkin picks
- Green floral wire
- Floral wire
Tip – Mini white pumpkin picks may be hard to find. They seem to sell out fast! I purchased orange pumpkin picks and painted them white using white acrylic paint.
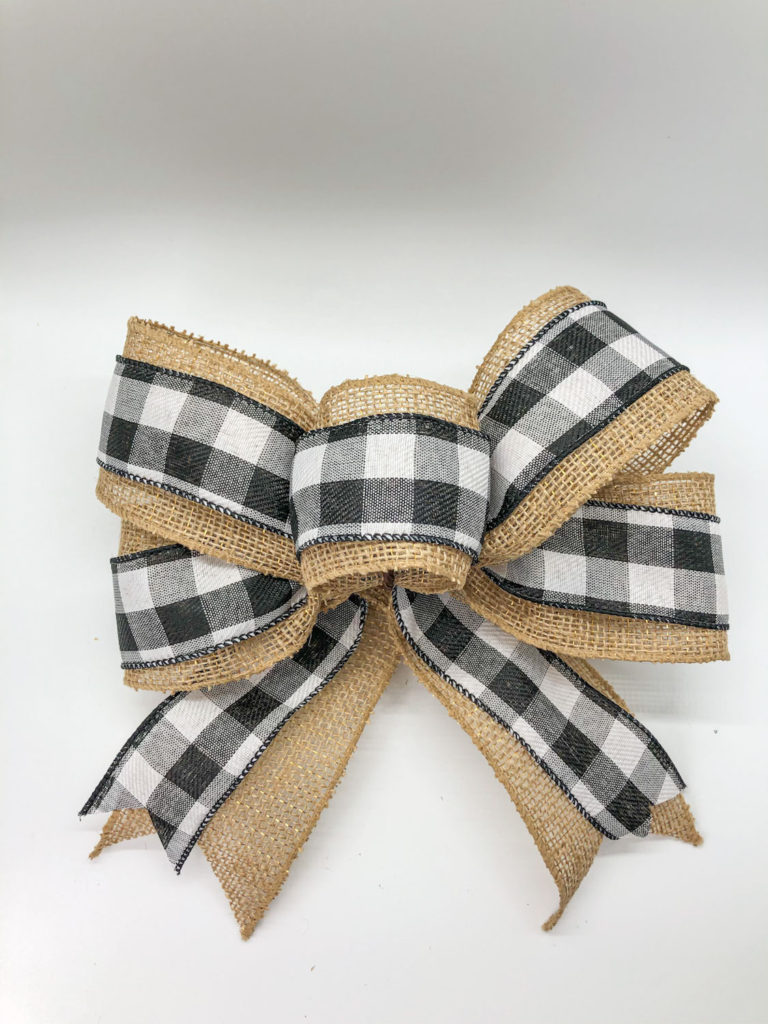
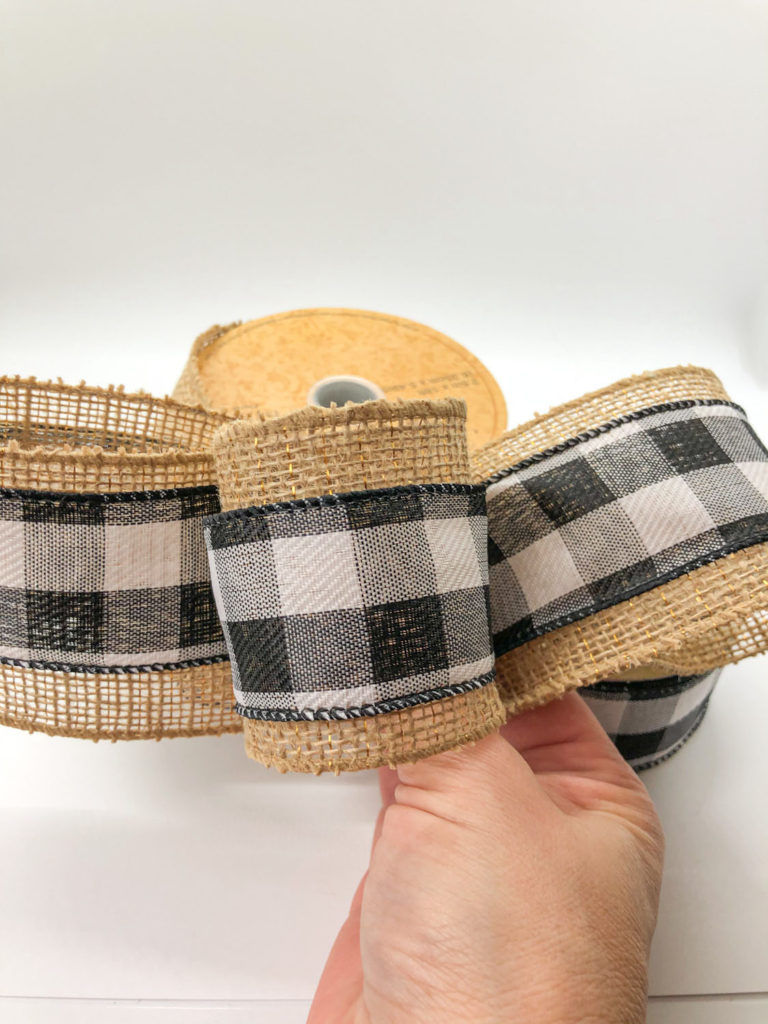
Double Bow:
I decided to make a large double bow. I used burlap and buffalo plaid ribbon. Choose the ribbon you like to achieve the desired effect. You may also skip making a bow and opt for purchasing one at the craft store.
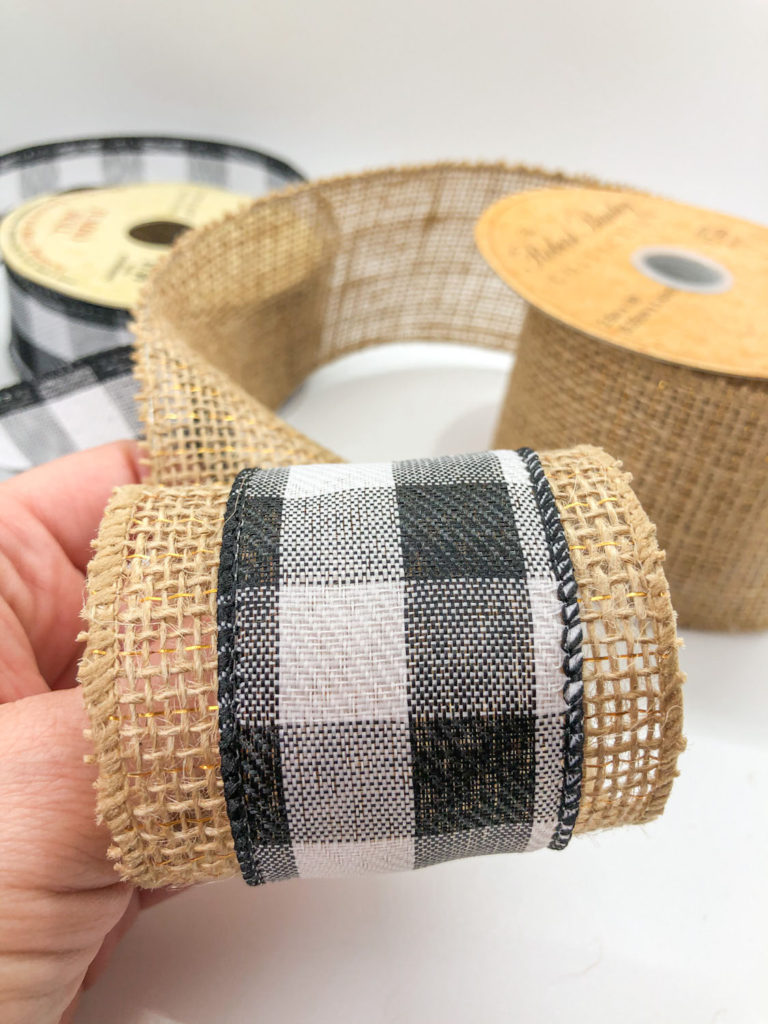
- 2 1/2 inch burlap wire ribbon (18 ft roll), or ribbon of choice
- 1 1/2 inch buffalo plaid wire ribbon (30 ft, jumbo roll), or ribbon of choice
- Floral wire
Tools:
- Wire Cutters
- Pliers
- Scissors
- Glue gun (optional)
Make the Wreath
Prep
- Use the wire cutter and cut off the faux maple leaves from the bunch. Leave the individual stem on the leaf long enough so you can attach it to the wreath.
- Use the wire cutter and cut off the individual fern leaves from the stem. Again, leave enough stem to attach to the wreath.
- Cut off the peony flowers from the large stem. Leave the stems attached to the flowers long enough so you can attach them to the wreath. (Use the peony leaves also, if desired.)
- Cut 20-30 strips of the green floral wire. The wire stips should be about 6-8 inches long. These will be used to attach the faux maple and faux fern leaves to the wreath. You may need to cut more throughout the process if needed.
Attach leaves, Picks, flowers, & bow
Attach the Leaves
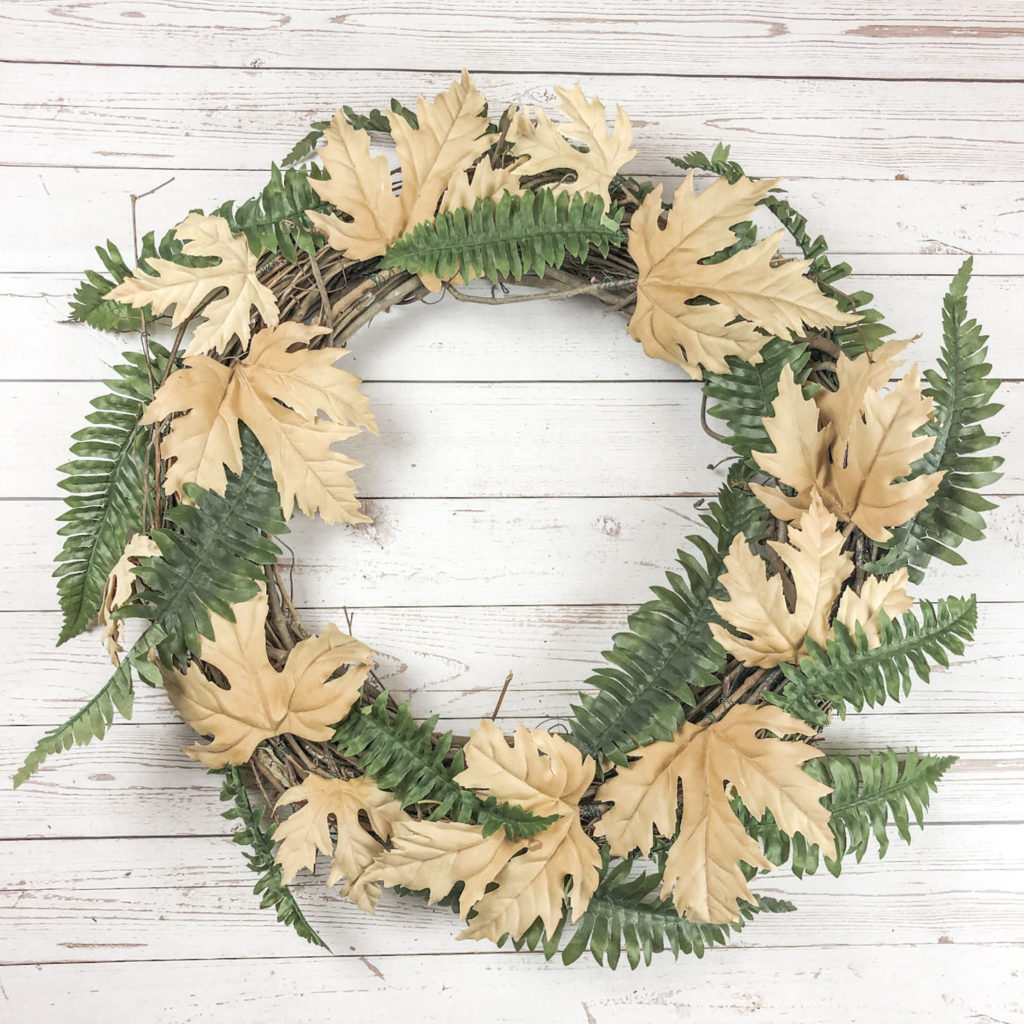
1. First, attach the faux maple leaves to the grapevine wreath, using the green floral wire. This can be a little tricky to get the hang of, but use your pliers and figure out a system that works best for you!
To do so, hold a leaf to a branch of the wreath and loop the wire around the stem and the wreath branch, looping it from underneath. Pull the wire up so it is underneath the stem and the branch. Wrap the wire around the stem, twisting the wire in each wrap. Attach to the wreath securely and tuck the ends of the wire underneath on the final wrap.
Continue the process of attaching the maple leaves, placing them in different directions, spacing evenly around the wreath.
2. Next, attach the faux fern leaves with the green floral wire. Use the same method as above. Use the circular shape of the wreath as a guide and place the leaves so they form a nice ‘swirl’ around the wreath. Space evenly around the faux maple leaves and fill any gaps around the inside and outside.
Figure out where you want to place your bow and approximately how large your bow will be. Leave space around that area, as it will be hidden by the bow.
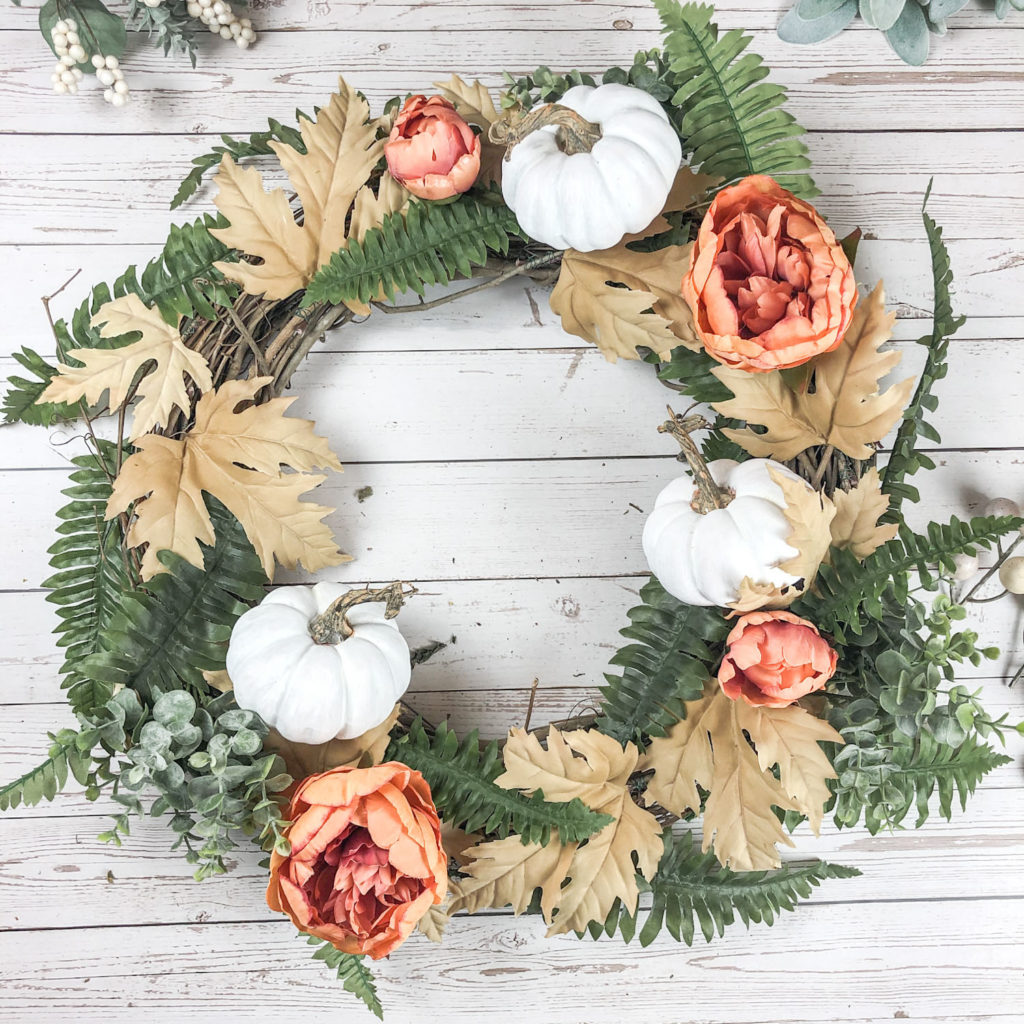
Attach the Eucalyptus & Mini Pumpkin Picks
3. Attach the faux eucalyptus stems/picks. I alternated directions when placing these. No need to wrap with wire, but you may do so.
4. Attach the mini white pumpkin picks. Play around with the placement. See what looks best and what will sit nicely on the wreath.
Once they are inserted into the wreath, trim off the ends if any are poking through the back of the wreath. (When inserting, try to place at an angle and not straight back into the wreath. This will help them to sit securely. You may also use a hot glue gun or wire, if preferred.)
Attach the Peonies & Berry Picks
5. Attach the faux peony flower heads/stems. Again, see what looks best. Use a hot glue gun to attach or wire, if preferred.
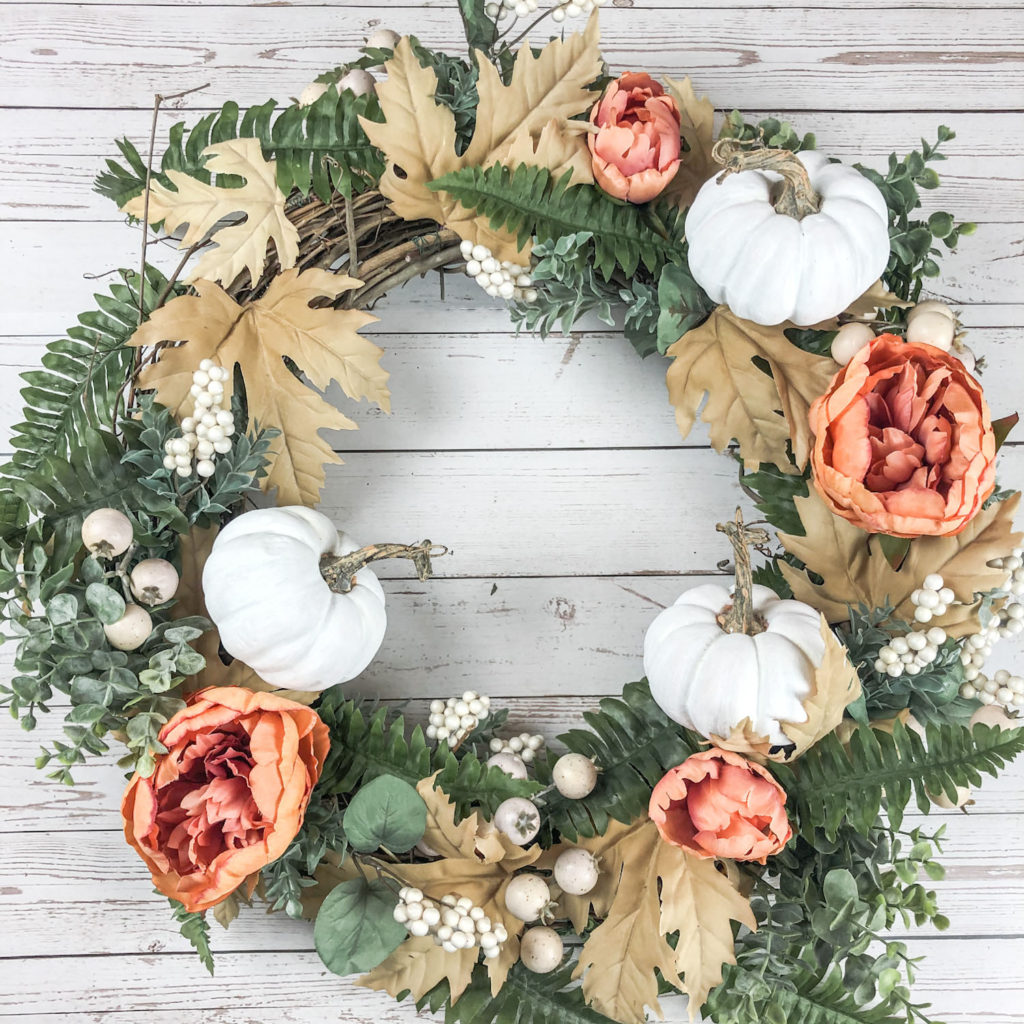
6. Attach the 3 white berry floral stems/picks. Stick them into the wreath at an angle, ensuring they won’t fall out. Everything should be fitting snugly at this point. When attaching the stems/picks, choose a spot in the wreath that feels secure when they are inserted.
7. Using the wire cutters, break apart the large white berry pick into smaller segments. Insert the smaller picks into the wreath.
Time to examine the wreath!
Look at the wreath on the outer and inner sections, and determine if more leaves/greenery/florals are needed to fill in any gaps.
Attach the Bow
8. Make your bow (see instructions below) or grab your pre-purchased bow.
9. Attach the bow. Use a hot glue gun, or run a 10-12 inch piece of fabric floral wire through the center of the bow loop and wrap around the wreath, securing at the back.
10. Hang your beautiful, farmhouse-style, fall wreath and enjoy!
How to Make the Bow
Small double bow 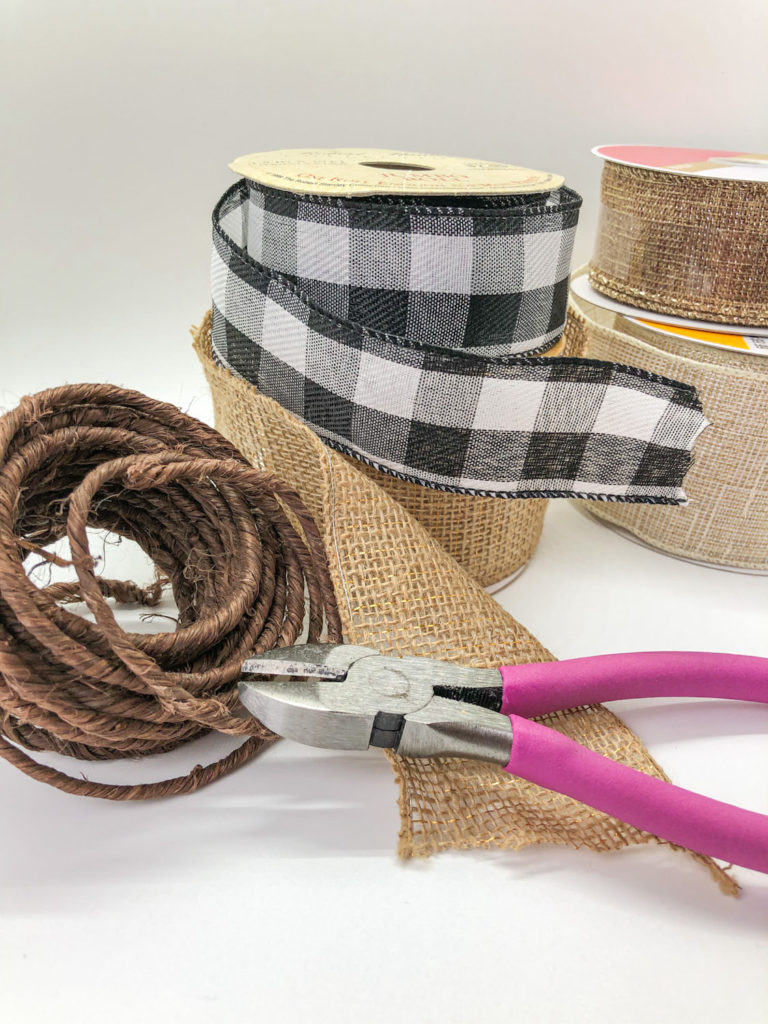
Gather your supplies, & scissors! Large double bow
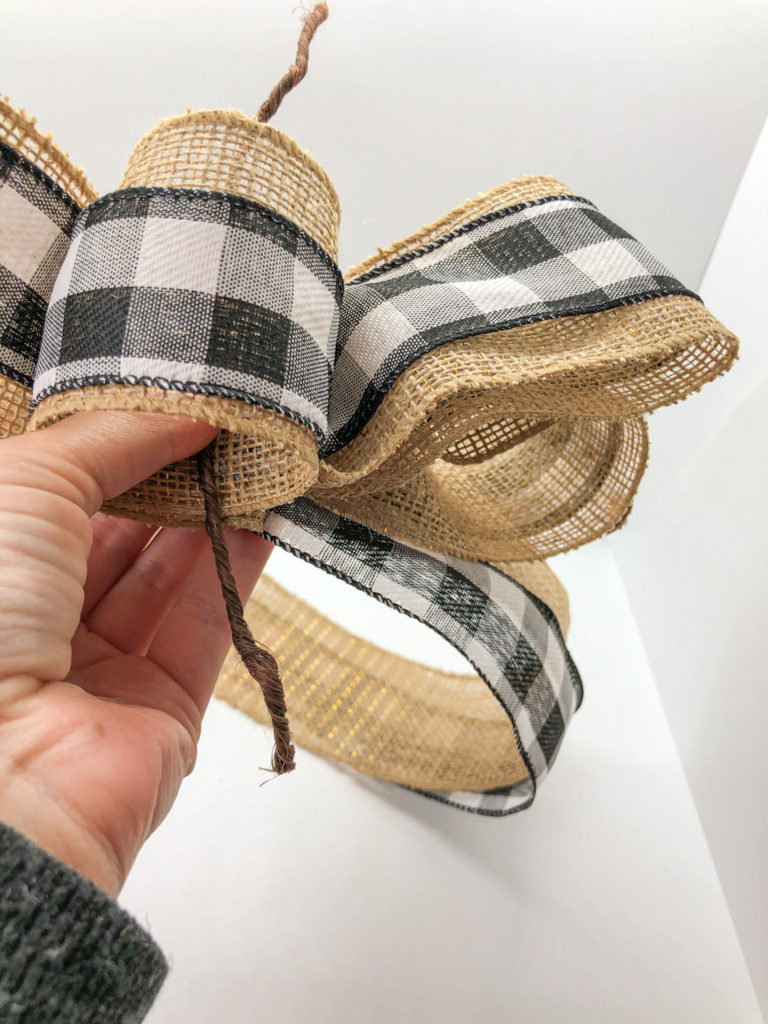
- First, cut off a piece of the floral wire, about 8-10 inches.
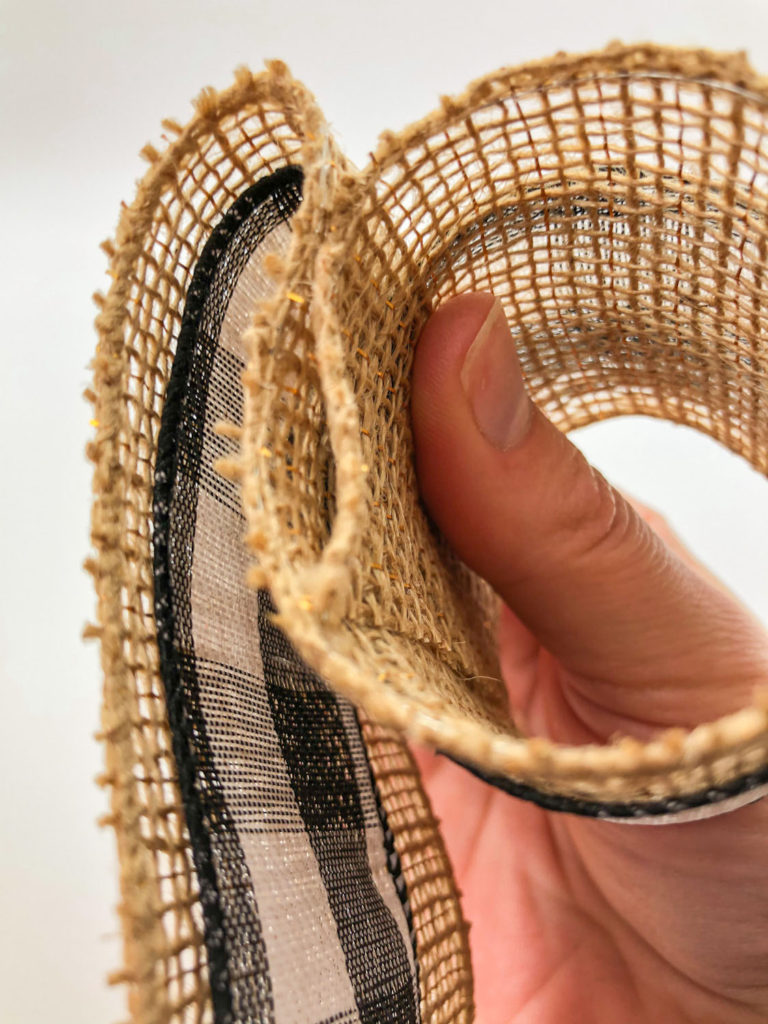
2. Next, take a ribbon from each spool, keeping them attached to the spools as you make the bow. Place the smaller ribbon on top of the larger ribbon, lining up the ends.
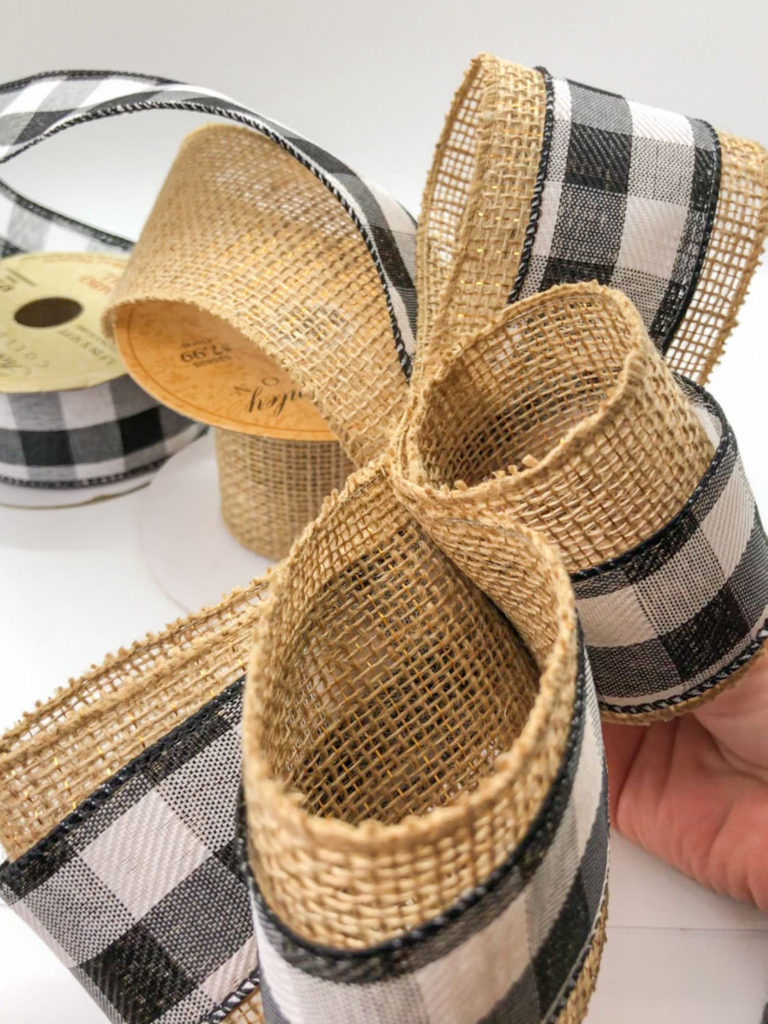
3. Then, make the center of your bow by creating a small loop. Keep your thumb inside the loop, holding down the end of your ribbons as you make the rest of the bow. Keep the ribbons attached to the spool as you’re making the bow.
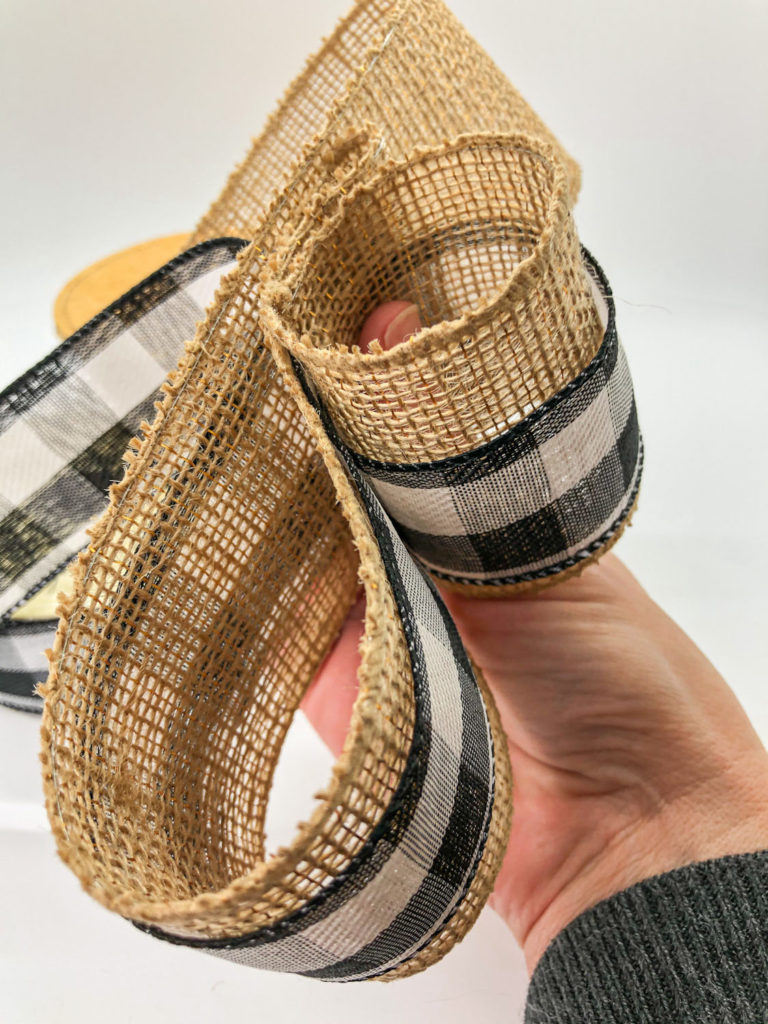
4. From the center loop, create a bigger loop on each side. Choose how big you want the bow to be. For example, for an eight-inch diameter (shown on the wreath above), do a four-inch loop on each side.
5. Go back and forth, making sure your thumb is securing the center of the bow, holding the loops together. Create as many loops as you would like.
Since the bow uses 2 ribbons, you will have to twist the ribbon at the center of the bow, at the back, as you begin to make the loops on each side. The smaller ribbon is always on top of the larger ribbon.
Keep a good grip on the center of the bow with your thumb during the entire process. This takes a little practice, but you can do it!
I made four loops on each side, making about an eight-inch diameter bow. You can adjust the size according to the size of your wreath and the look you want to achieve.
For the tutorial, I’m demonstrating a smaller bow, two loops on each side.
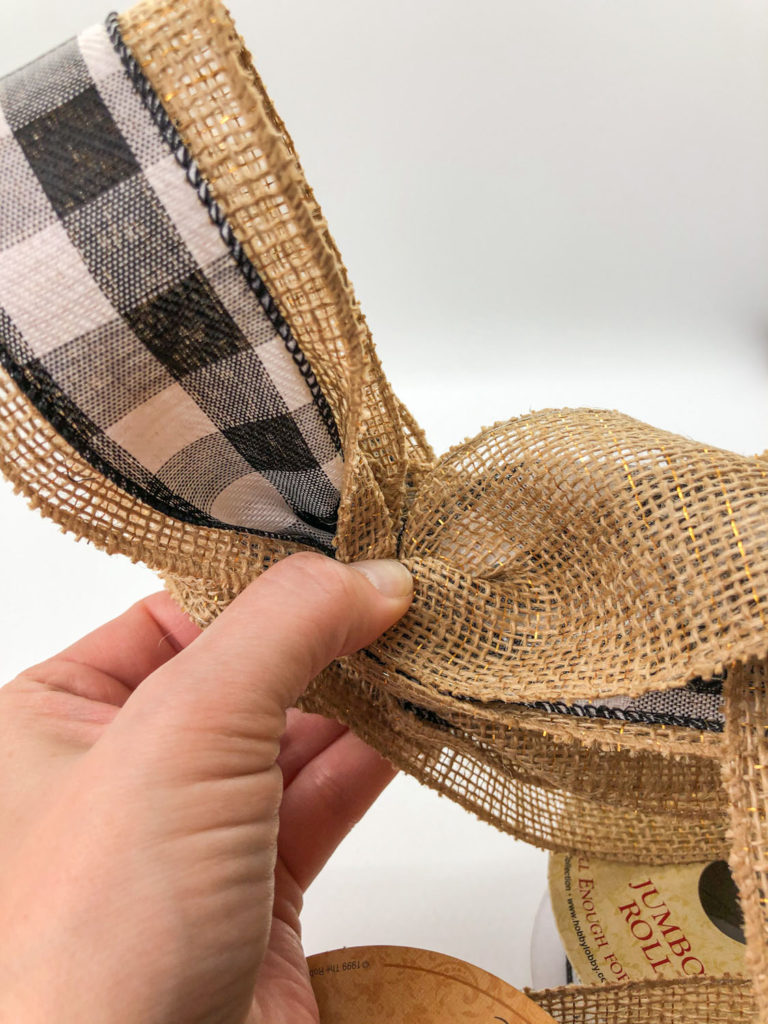
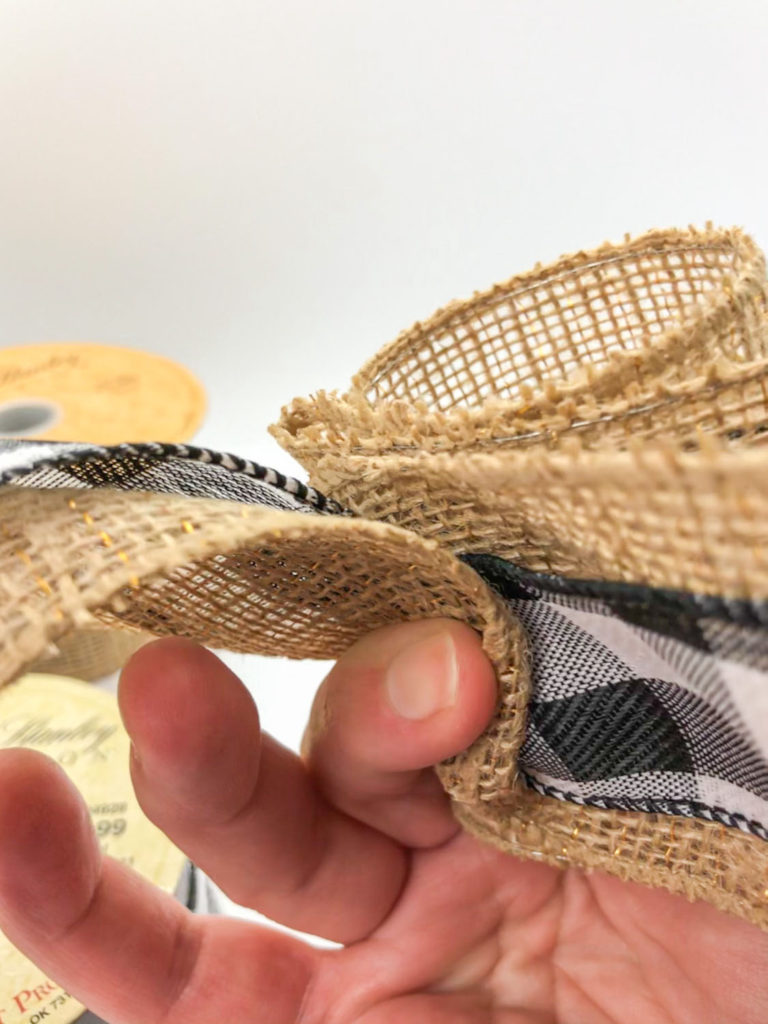
6. To finish off the bow, create one large loop. This loop will make the tails of the bow. Cut the ribbon off of the spools, right at the top of the large loop by the center of the bow.
Make sure you are keeping your thumb at the center of the bow. (I know, it will probably be cramping a little bit by now!) You may also use a hot glue gun to glue at the center each time, in place of holding with your thumb. Decide what works best for you!
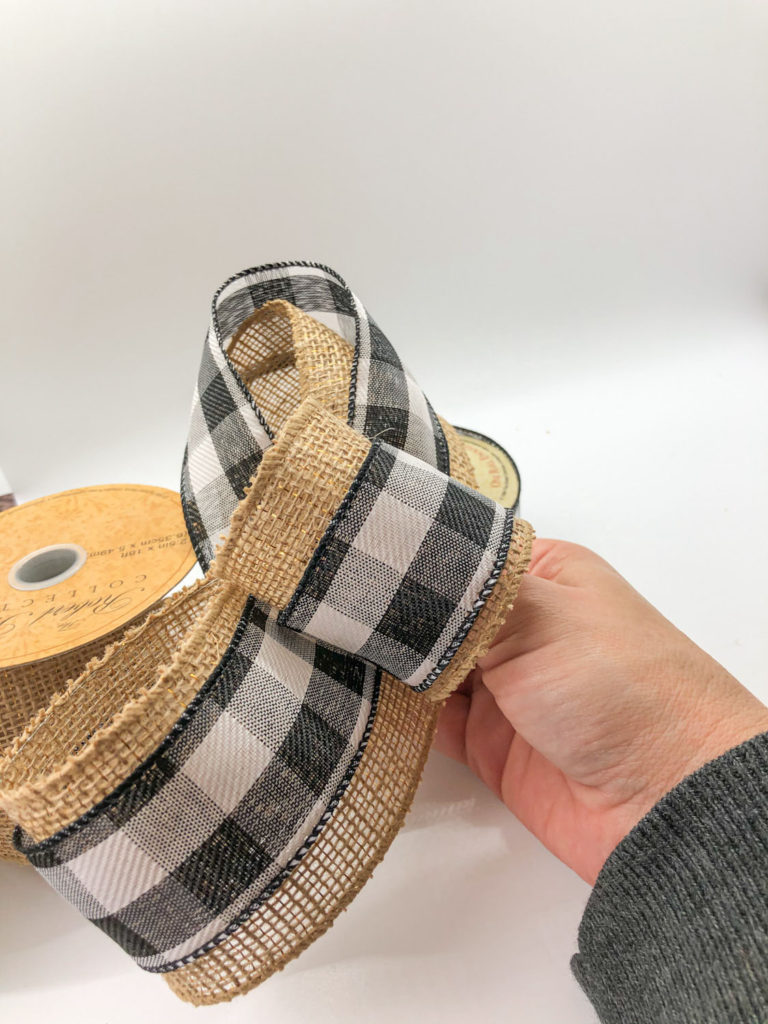
7. Insert the wrapped floral wire into the center loop and bend the ends down and around to the back. Tighten the center of the bow and twist the floral wire at the back. Secure the ends down tightly so the bow won’t unravel.
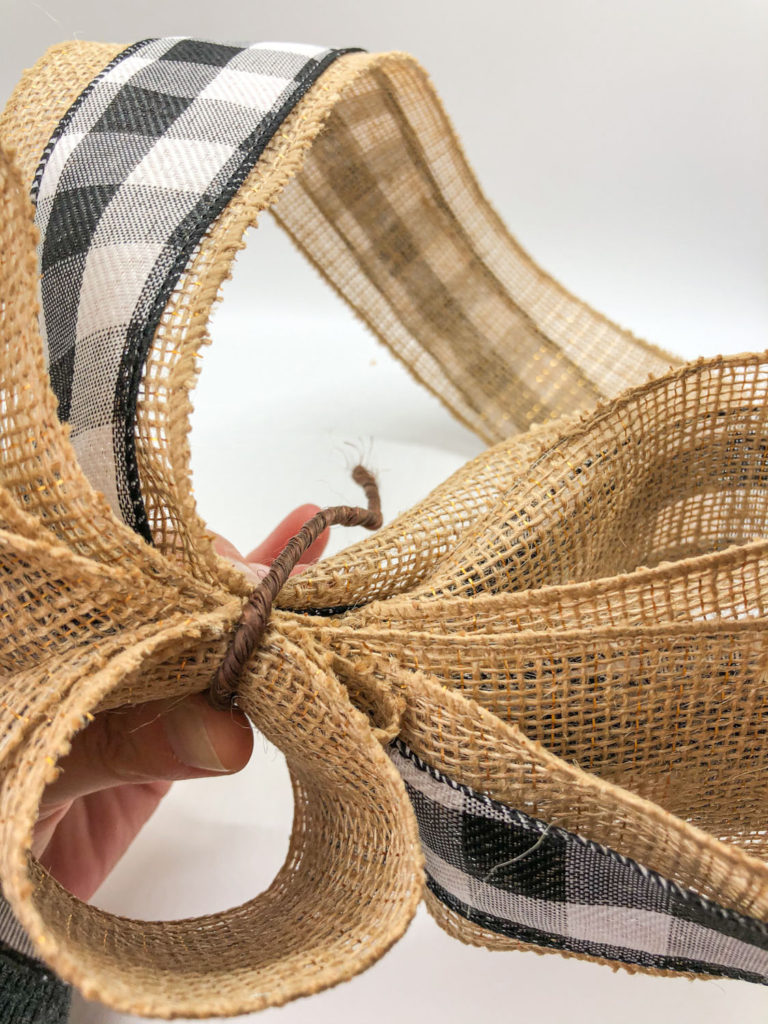

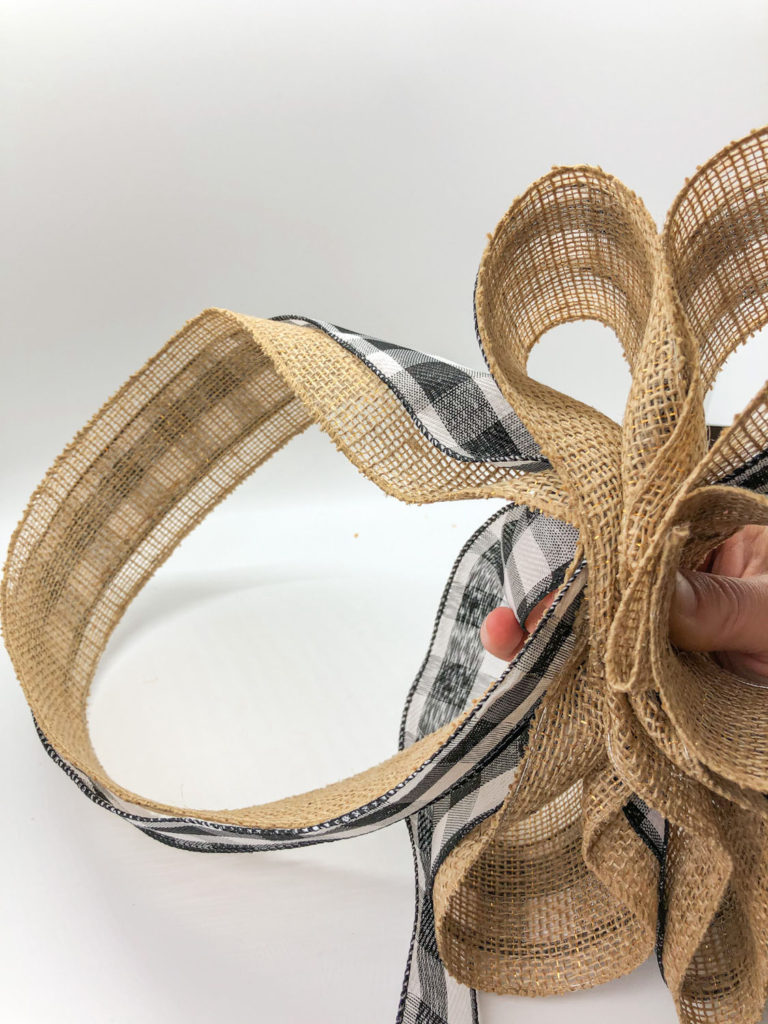
8. Fluff the bow and spread out the loops. It is so easy to manipulate the wire ribbon to achieve a nice fluffy bow! (Try not to pull too hard on the loops when fluffing, as it could come undone from the floral wire.)
9. Cut the loop at the end, opposite the bow, to make the tails. Once the loop is separated, decide how long you want your tails to hang and cut them to the desired length.
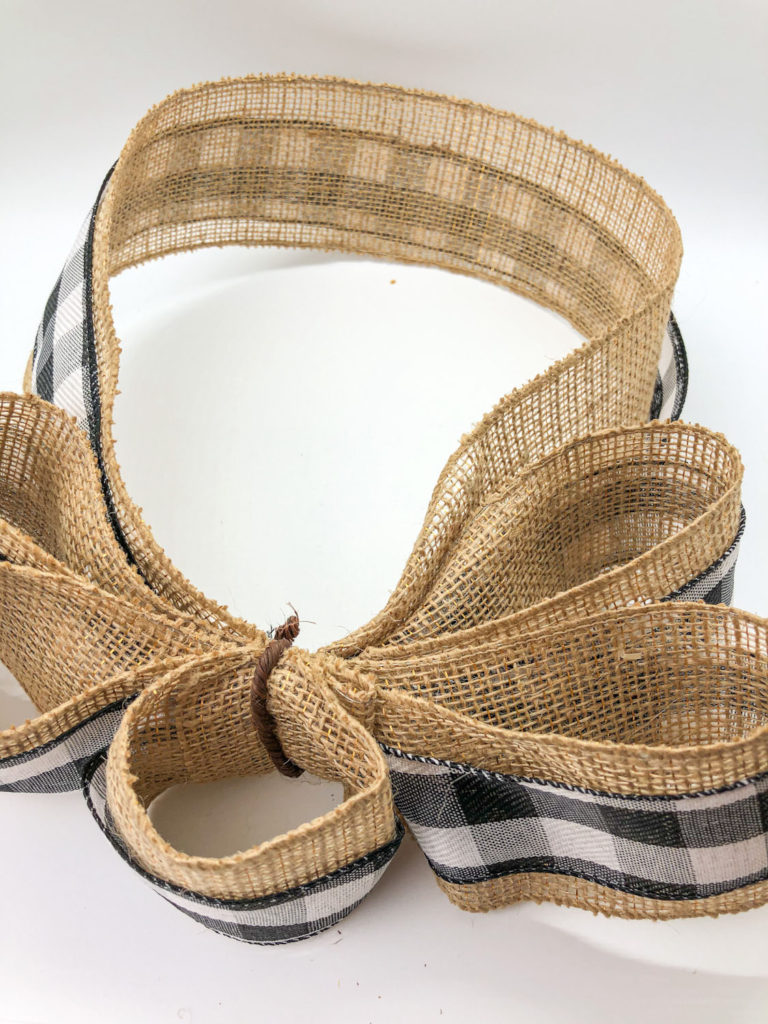
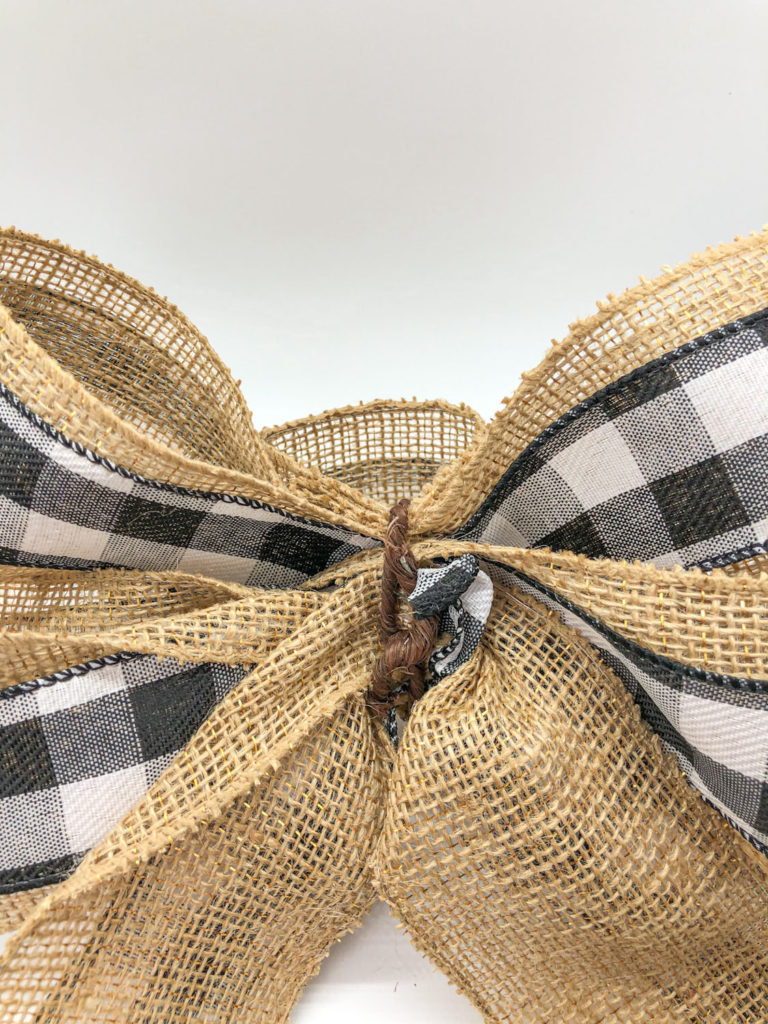
Now, you have a custom double bow – so pretty!
Attach Bow to the Wreath
To attach to the wreath, run a 10-12 inch piece of the floral ribbon through the center of the bow loop, wrap around the wreath, and secure it in the back.
Hang the Beautiful DIY Farmhouse Fall Wreath & Enjoy
Hang and enjoy your Beautiful DIY Farmhouse Fall Wreath throughout the fall season!
You can also change up the look from year to year by swapping the bow or florals.
I’d love to hear your comments and how you plan to make your fall wreath. Please share them below!
Blessings, friends!


Oh my goodness Faith!!! That wreath is beautiful!! You definitely have a gift for creativity!!
Thank you, Kristin!! I appreciate your kind words! I was so happy with how it turned out!